Free Crochet Magic!
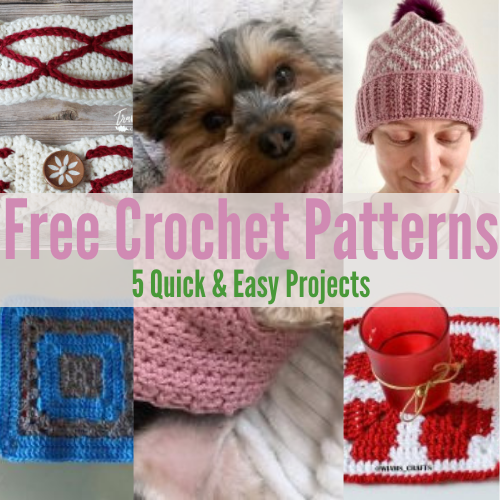
Are you needing some fun new crochet patterns to keep those fingers busy? Well, I have found 5 stunning patterns to add to your pattern stash! They are all relatively quick and easy, so perfect for beginners and advanced stitchers alike!
The turtleneck dog sweater crochet pattern is an easy skill level and super cute for any little spoilt pooch in winter!
Next we have the one and only crocheted granny square you’ll ever need. Make them in a variety of colours and stitch together into a colourful blanket!
The Valentine’s Coaster is soooo cute! I am making these for all year round hearty fun! I love heart crafts, so they will fit right into my country cottage interior style!
The crochet beanie Ebun Hat take just a couple of evenings to make and will be perfect for those cold winter days!
Lastly, create a cute winter waves crochet headband with this easy pattern! It looks complicated but it’s not! Lots of great texture and a design that looks like you spent a lot of time on it.
If you love this post, then sign up right here to receive notifications of new fun craft patterns added to my site. I promise I won’t spam your inbox!
[mc4wp_form id=”1663″]
Contents:
- Crochet Dog Sweater Pattern – by Memory Lane Crochet
- The Only Crocheted Granny Square Pattern You’ll Ever Need – Fave Crafts
- Valentine’s Coaster Pattern – Wiam’s Crafts
- Ebun Hat – Exquisite Crochet UK
- Winter Waves Headband – Traverse Bay
Crochet Turtleneck Dog Sweater Pattern:
This is just so adorable!! Made by Memory Lane Crochet, you can visit their site to see what else they create by clicking here.

How it’s made
The turtleneck dog sweater crochet pattern is easy skill level. You’ll need to know basic crochet stitches. Additionally you’ll need to know how to work into the front and back posts and loops. You’ll also need to be okay with working into the raw edges.
Crochet pattern info
Hook sizes
6.5mm crochet hook
Yarn
Chunky yarn – 148yd / 136m. We recommend Bernat Softee Chunky Yarn in Baby Pink.

Abbreviations
- ch – Chain
- blo – Back loop only
- st/sts – Stitch/stitches
- sl st – Slip stitch
- sc – Single crochet
- hdc – Half double crochet
- 2hdc – Increase (2 half double crochet in 1 space)
- sc2tog – Decrease (single crochet 2 together)
- hdc2tog – Decrease (half double crochet 2 together)
- BPdc – Back post double crochet
- FPdc – Front post double crochet
Gauge / tension
Gauge is important as everyone crochets with a different tension. Therefore, if your 2” swatch doesn’t match up you can change your hook size to suit your tension.
6.5mm hook – 2” x 2” = 5 rows of 7 hdc
Finished size
The following measurements are taken of the garment at its smallest size and its stretched size. Using an acrylic yarn will give your sweater more stretch than other fibres such as cotton.
- Back length : 16cm
- Neck circumference : 24cm – 40cm
- Waist circumference : 42cm – 50cm
- Leg circumference : 13cm – 20cm
Pattern notes
- I do not count chains in my stitch count.
- Numbers in brackets are the number of rows/stitches.
- Stitches separated with a comma are to be made in separate spaces eg. (sc, inc) would mean sc in first stitch then inc in next stitch.
Supplies
You will need the following supplies to complete the crochet project (links will take you directly to recommended supplies)
Pattern Instructions:
Turtleneck
Round 1
ch x 16
sc x 15 start from 2nd ch from hook
ch 1 and turn
(15 sts)
Rows 2 – 34
Work every stitch in back loop
blo sc x 15
ch 1 and turn
(33 rows of 15 sts)

Row 35
Work in both row 34 and row 1 to join the sides together
sc x 15
ch 1 and turn to raw edge
(15 sts)

Round 36
Work in raw edge, 1 stitch at the end of every row
sc x 34
sl st to join to 1st st and ch 1
(34 sts)

Round 37
2hdc x 16
ch 2 & skip 2 sts to make a gap for collar access
2hdc x 16
sl st to join to 1st st
fasten off
(64 sts)

Chest of sweater
To start count back 5 stitches & reattach yarn (skip 4)

Row 38 – 44
hdc x 10
ch 1 & turn
(7 rows of 10 sts)

Back of sweater
Return to the last round of turtleneck (R37)
Count forward 11 stitches & reattach yarn (skip 10 stitches)

Row 45
hdc x 17 in sts
hdc x 2 in collar ch space
hdc x 17 in sts
ch 1 & turn
(36 sts)
Row 46 – 51
hdc x 36
ch 1 & turn
(6 rows of 36 sts)

Waist
Round 52
We will now join both pieces together to start the waist area by working into row 51 then row 44.
hdc x 36 in previous row
hdc x 10 in row 44 (chest)
sl st to join to first st
ch 1 and turn
(46 sts)

Round 53 – 55
hdc x 46
sl st to join to first st
R53 & R54 – ch 1 & turn
R55 – ch 1, do not turn
(3 rounds of 46 sts)
Round 56
hdc x 2
(hdc2tog, hdc x 9) x 4
sl st to join to first stitch
ch 1, do not turn
(42 sts)
Round 57
(BPdc, FPdc) x 21
sl st to join to first stitch
Fasten off
(42 sts)
Sleeves
Attach yarn to any stitch of arm hole
Round 58
sc x 32 around arm hole
sl st to join to 1st st & ch 1
(32 sts)
Round 59
sc2tog x 16
sl st to join to 1st st
Fasten off
(16 sts)

Round 60 – 61
Repeat round 58 & 59 for 2nd sleeve.
Weave in all ends and fold over turtleneck to complete.
(2 rounds)
(Thank you to Memory Lane Crochet – see the original post here.)
********************
The only crocheted Granny square you’ll ever need

This is The Only Crocheted Granny Square Pattern You’ll Ever Need.
This easy beginner granny square crochet pattern is available from Fave Crafts and is so easy to alter to suit your needs and simple enough for beginners to make as well. You can see the original post here.
Granny square crochet doesn’t have to be difficult. You can make some of the most stellar designs with granny squares as your foundation.
Mix and match your own yarn colors to create beautiful designs and then arrange them into a lovely afghan. Great for crochet fans of all skill levels, this crochet granny square is a quick project that’s great for using up yarn in your stash.
Crochet Hook: H/8 or 5 mm hook
Yarn Weight: (4) Medium Weight/Worsted Weight and Aran (16-20 stitches to 4 inches)
Finished Size: Pattern creates an 8″ square
Materials List
- 25 grams of worsted weight yarn, in Color A (A)
- 50 grams of worsted weight yarn, in Color B (B – the solid section)
- 5mm/H crochet hook
Instructions:
-
Foundation: With A, chain 4, join to form a circle.
-
Round 1: Ch. 3, 2 dc, ch 2, (3 dc, ch 2) 3 times, sl st to join to the 3rd chain stitch from foundation loop. Do not turn.
-
Round 2: Slip stitch to the next chain-2 space. Ch 3, 2 dc in space, ch 2 to form corner, 3 dc in same space, ch 1, (3 dc in next space, ch 2 to form corner, 3 dc in same space, ch 1) 3 times, sl st to join to the 3rd chain stitch. Break off yarn. Do not turn.
-
Round 3: Grab your B and attach it to the chain-2-space in one of the corners. Ch. 2, 1 dc, ch 2, 2 dc, work 1 dc in every dc and chain 1 (7 dc in each solid section, not counting with the corners), *2 dc in space, ch 2 to form corner, 2 dc in same space, work 1 dc in every dc and chain 1. Do not turn.
-
Round 4: Slip stitch to the next chain-2 space. Repeat round 3 (11 dc in each solid section, not counting with the corners). Break off yarn. Do not turn.
-
Round 5: Again with A, attach yarn to the chain-2-space in one of the corners. Ch. 3, 2 dc, ch 2, 3 dc, (ch 1, skip 3 dc, 3 dc in next st) 3 times, (3 dc in next space, ch 2, 3 dc in same space, ch 1, skip 3 dc, 3 dc in next st x 3 times) 3 times);
-
Round 6: Slip stitch to the next chain-2 space. Ch 3, 2 dc in space, ch 2 to form corner, 3 dc in same space, (ch 1, 3 dc in chain-1 space, ch 1 x 4 times, 3 dc in next space, ch 2, 3 dc in same space) repeat until the end of the round. Break off yarn. Do not turn.
-
Round 7: Repeat round 3 (23 dc in each solid section, not counting with the corners).
-
Round 8: Repeat round 4 (27 dc in each solid section, not counting with the corners). Break off yarn. Weave in ends.
(Thank you to Fave Crafts for this great pattern! See the original post here
********************
Valentine’s Coasters

Skill level: EasyMaterials
- Yarn: you can use any light worsted yarn. Nako Vizon was used, 100% premium acrylic, 3.5 oz. (100 g), 213 yards (195m). You can use white yarn plus any colored yarn you like. OR you can try this:
50-Pack of 44 Yard Acrylic Yarn Assorted Colors Skeins – Perfect for Mini Knitting and Crochet Projects, available from Amazon.
- Crochet Hook: 6 US (4 mm).
- Tapestry needle.
Measurements: 5.5″ x 5.5″ (14 cm x 14 cm) approx.
Gauge: 20 sts x 10 rows = 4″x 4″ (10 cm x 10 cm) in dc stitch.
Yardage: 33 – 35 yards (30 – 32 m).
Crochet Terms (US):
- ch: chain.
- ss: slip stitch.
- dc: double crochet.
Instructions:
With white yarn make a magic ring:
With white yarn only (don’t cut colored yarn):
Cut white yarn, with colored yarn:

(Thank you to Wiam’s Crafts for this super cute pattern! See the original post here.)
********************
Ebun Hat Pattern

Skills required:
Chain (ch), Foundation crochet cord, Tunisian crochet technique (alternating forward (FP) and return (RP) passes), Tunisian simple stitch (tss), Tunisian purl stitch (tps), Tunisian knit stitch (tks), end row changing colours, changing colours as you go, binding off in Tunisian crochet, blocking, Locking Mattress Stitch.
Skill level:

Finished measurements:
The final cowl measurements (blocked):
51.5 x 28 cm (when ribbing is not folded or 21 cm with folded ribbing) cm (approx. 20.75 in x 11.25 in (when ribbing is not folded or 8.5 in with folded ribbing))
Materials and tools:
Expression Fiber Arts North DK (66% Extra Fine Merino Wool, 34% Pima Cotton | DK | 100 g (3.5 oz) = 241 m (264 yds)) – (A) try this yarn in lilac, and (B) this yarn in powder! 1 skein each.

- Tunisian crochet hook size 5 (H/8) and 5.5 (I/9) mm with cable (at least 40 cm (16 in)) or size to obtain the gauge – Try this 12 piece hook and cable set.
- 9.5 cm Pompom (Schachenmayr in Burgundy – or try these gorgeous ones!
- Tapestry needle
- Scissors
Gauge:
Blocked Gauge:
5.5 (I/9) mm hook: 19 sts x 15 rows = 10 x 10 cm (4 x 4 in) over st pattern
5 (H/8) mm hook: 19 sts x 15 rows= 10 x 10 cm (4 x 4 in) over ribbing pattern
Stitch guide:
Tunisian crochet stitches are worked in forward and return pass from right to left, with the number of stitches (loops (lps)) increasing on the hook during the forward pass and decreasing during the return pass.
Return pass is worked in the same way for all stitches (rows of stitches) used in this project as follows: 1 ch, *yrh, draw through 2 lps on hook, rep from * until 1 lp on hook.
Edge stitches:
Right edge stitch- This is the first stitch and is not usually worked into because there is one loop on the hook left after completing the return pass of the previous row. This one lp corresponds to the first stitch of the new row.
Left edge stitch- This stitch is referred to in the pattern as the End Stitch (ES) and is crocheted as follows: Rotate the end of the fabric towards yourself, insert the hook under both bars (left and right) of the last st, yrh and pul.
- First row of Tunisian crochet: Insert the hook in the back bump of second ch from hook, yrh and pul across. Standard return pass.
- Tunisian simple stitch: Insert the hook from right to left under front vertical bar of the next st, yrh and pul. Standard return pass.
- Tunisian purl stitch: Bring yarn to the front on the work and hook, insert the hook from right to left under the front vertical bar of the next st, yrh and pul. Standard return pass.
- Tunisian knit stitch: Insert the hook from front to back between the front and back vertical bar, yrh and pul. Standard return pass.
Bind off: Insert hook from right to left under front vertical bar of the next st, yrh, pul and pull through the lp that is on the hook. One loop remains on the hook.
RP End row changing colours in Tunisian crochet: The new colour is added when finishing the return pass of the previous row and 2 lps are remaining on the hook. Yrh with the new colour and draw through 2 lps.
Changing colours as you go: When changing the colours within a row in Tunisian crochet, place the new strand of yarn over the old strand. This locks the old colour in place and prevent gaps occurring between the different colour sections.
Stitch charts:
Ribbing

Main stitch pattern (colourwork)


Notes:
The Ebun Hat is worked flat, RS facing from right to left, and assembled using the Locking Mattress Stitch along the short sides of the project.
The ribbing is worked in two parts; first half is worked continuously from the foundation cord till Row 10. The project is then placed RS down and another 9 rows of ribbing are worked from the other side of foundation cord, followed by the colourwork section to the top of the hat.
Ribbing is made using smaller hook, while the main body of the hat is made using larger hook.
In the stranded colourwork (the background colour is carried over and wrapped around the pattern colour every 2-3 stitches to avoid loose floats.
It is important to keep the passive yarn taut but not too tight to avoid distorting the diamond pattern), use colour A for tks and colour B for tss (EXCEPT for Rows 40-41, which are in worked colour A). This combination gives the final project a distinct texture.
Both Edge Stitches are worked in colour A.
Instructions:
Ribbing
With A and smaller hook, make crochet foundation cord 98 sts long.
Row 1 FP: Insert the hook under top front and back lps of second st from hook, yrh and pul across. 98 lps on hook.
Row 1 RP and all other RPs: Standard RP.
Row 2: *Tps, 2 tks; rep from * to last st, ES.
Rows 3-9: As Row 2.
Row 10: Bind off.
Place the ribbing RS down with Row 10 being at the bottom. Attach A to the first st of the other side of crochet foundation cord (under front and back lps).
Rows 11-19: Rep rows 1-9.
Body of the hat – colourwork
Change to larger hook. Work tks in colour A and tss in colour B.
Row 20: *Tks, 2 tss, 2 tks, 2 tss, 3 tks, 2 tss, 2 tks, 2 tss; rep from * to last st, ES.
Row 21: *2 Tks, 2 tss, 2 tks, 2 tss, tks, 2 tss, 2 tks, 2 tss, tks; rep from * to last st, ES.
Row 22: *Tss, 2 tks, 2 tss, 2 tks, 3 tss, 2 tks, 2 tss, 2 tks; rep from * to last st, ES.
Row 23: *2 Tss, 2 tks, 2 tss, 2 tks, tss, 2 tks, 2 tss, 2 tks, tss; rep from * to last st, ES.
Row 24: *Tks, 2 tss, 2 tks, 2 tss, 3 tks, 2 tss, 2 tks, 2 tss; rep from * to last st, ES.
Row 25: *2 Tks, 2 tss, 2 tks, 2 tss, tks, 2 tss, 2 tks, 2 tss, tks; rep from * to last st, ES.
Row 26: *Tss, 2 tks, 2 tss, 2 tks, 3 tss, 2 tks, 2 tss, 2 tks; rep from * to last st, ES.
Row 27: As Row 25.
Row 28: As Row 24.
Row 29: As Row 23.
Row 30: As Row 22.
Row 31: As Row 21.
Row 32: As Row 20.
Row 33: *2 Tss, 2 tks, 2 tss, 2 tks, tss, 2 tks, 2 tss, 2 tks, tss; rep from * to last st, ES.
Rows 34-39: Rep rows 20-25 once.
Rows 40-41: With A, tss across to last st, ES.
Row 42: Bind off.
Finishing:
Weave in ends and block to final measurements as in schematic. It is recommended to block the project in two stages, first with the project laid flat and second with the ribbing folded at the crochet foundation cord.
Join two short sides by Locking Mattress Stitch (See Special Techniques).
Turn hat inside out with WS facing. Using yarn needle and approx. 20 in of yarn, thread yarn between every 2-3 sts of last row around the whole row. Pull the yarn tight enclosing the crown. Make a knot securing the closing and turn hat right side out (RS facing). Attach a faux fur pompom using loose ends of drawstring if needed, otherwise these can be woven in on the inside of the hat.
Special techniques:
Foundation Crochet Cord
- Make a slip knot allowing enough yarn on the short end for the length of the foundation cord
- Place the short end of yarn over the hook from front to back
- Yarn over the hook with the long end of yarn and pull through both lps on the hook
- Repeat steps 2 and 3 for required number of stitches.
Winter Waves Crochet Headband

Materials:
Abbreviations:
ch- chain
st(s)- stitch(es)
hk- hook
sc- single crochet
dc- double crochet
sc2tog- single crochet 2 together
Body of headband:
Ch 50
Row 1: Dc in the 3rd ch from the hk and each ch across, turn (48).
Rows 2-6: Ch 2, dc in each st across, turn (48). Fasten off on last row.
Texture Accent:
With contrasting color pull up a st on the side in between the first two rows. Sc in between each st across. Fasten off a long tail and weave it into the first st to join.

Repeat the texture accent every other row for a total of 3 rows.
Weave in all ends.
Cut a small piece of yarn, about 6″. With blunt needle sew together the two rows of color at the ends of the headband and every 12th stitch. Fasten off on the back and weave in ends. Makes sure to weave in your ends securely so it does not unravel.

For the top row, sew together the top and second row of color every 6th stitch. Fasten off on the back and weave in ends.
Left side:
Pick up a stitch at the top corner of the headband and sc 10 sts evenly across.
Row 1: Ch 1, turn, sc2tog, sc next 8 sts, sc2tog (8).
Row 2: Ch 1, turn, sc in each st across (8).
Row 3: Ch 1, turn sc2tog, sc next 4 sts, sc2tog (6).
Row 4: Ch 1, turn, sc in each st across (6).
Row 5: Ch 1, turn, sc2tog, sc next 2 sts, sc2tog (4).
Row 6: Ch 1, turn, sc in each st across (4).
Continue to sc along the side until you reach the body of the headband and fasten off.
Pick up a st on the other side where the body meets the side and sc across to end and fasten off. Weave in all ends.

Right side:
Pick up a stitch at the top corner of the headband and sc 10 sts evenly across.
Row 1: Ch 1, turn, sc2tog, sc next 8 sts, sc2tog (8).
Row 2: Ch 1, turn, sc in each st across (8).
Row 3: Ch 1, turn sc2tog, sc next 4 sts, sc2tog (6).
Row 4: Ch 1, turn, sc in each st across (6).
Row 5: Ch 1, turn, sc2tog, sc next 2 sts, sc2tog (4).
Row 6: Ch 4, turn, sc in last st (button hole).
Row 7: Ch 1, turn, 4 sc in hole you just made (around the ch 4 from previous row).
Continue to sc along the side until you reach the body of the headband and fasten off.
Pick up a st on the other side where the body meets the side and sc across to end and fasten off. Weave in all ends.

(Thank you to Traverse Bay Crochet for this quickie! Here’s the original post.)
Disclosure: As an Amazon Associate, I earn from qualifying purchases. This costs you nothing, but for legal reasons, I must inform you that if you click on one of my links in this post and subsequently make a purchase, I will earn a commission for referring you to Amazon. So, if you go ahead and click on through today and buy something, let me say a HUGE thank you!
Follow and Join me on my Pinterest Group Board:
If you loved this post, then follow me to receive notifications of new fun crochet patterns added to my site. I promise I won’t spam your inbox!
Happy Crocheting!!
Leave a Reply